Building simple QT application visionsom-stm32mp1
From SomLabs Wiki
Building simple QT application
This article explains how to configure tools and build a simple example for VisionSOM-STM32MP1 target using the Qt library. The whole tutorial was prepared for the PC with Ubuntu 18.04 as the host system and the OpenSTLinux target system prepared according to this tutorial: OpenSTLinux for VisionSOM-STM32MP1.
Configuring the VisionSOM-STM32MP1 target
The target system should have the default OpenSTLinux image installed as described here.
Configuring the host system
The host system requires the installed OpenSTLinux SDK, which can be build as described on this site. The default system image for the VisionSOM-STM32MP1 has the basic Qt libraries enabled by default.
Configuring Qt creator
Now, we can configure the programming environment for the Qt applications. We will use the Qt Creator IDE - the official tool for the Qt framework. It can be installed on the host system from the distribution package:
sudo apt-get install qtcreator
This tutorial is based on the Qt Creator 4.5.2.
The Qt creator needs to be run from the terminal with the environment configured using the script from sdk:
. /opt/st/stm32mp157a-visionsom-mx/2.6-snapshot/environment-setup-cortexa7t2hf-neon-vfpv4-ostl-linux-gnueabi
qtcreator
After running the IDE we need to configure our device and toolchain. Let's open the Device options by selecting the Tools->Options menu and add a new Generic Linux Device:
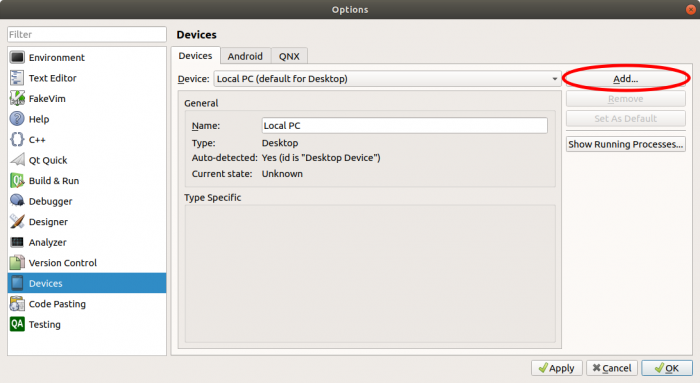
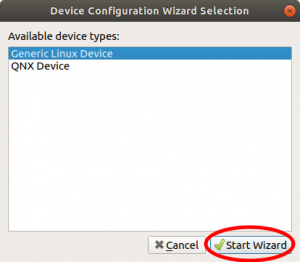
In the wizard window we need to specify the device name, the IP address, username and password in order to allow Qt Creator the SSH access to our target system. The configuration will be automatically verified after we finish the setup.
Our device is ready, so let's move on to the toolchain configuration in the Tools->Options Build&Run menu. First, in the Qt Versions tab, we need to verify that the SDK libraries are automatically found bythe IDE:
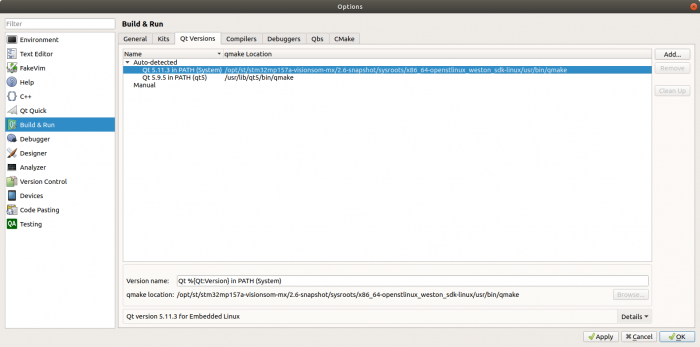
Otherwise we need to manually specify the path to the qmake binary:
/opt/st/stm32mp157a-visionsom-mx/2.6-snapshot/sysroots/x86_64-ostl_sdk-linux/usr/bin/qmake
Next is the compiler (C and C++) in the Compilers tab. We need to set the correct paths to the gcc and g++ cross-compilers, the ABI (arm-linux-generic-elf-32bit) and any name that will help us to recognize it later.
C compiler path:
/opt/st/stm32mp157a-visionsom-mx/2.6-snapshot/sysroots/x86_64-openstlinux_weston_sdk-linux/usr/bin/arm-openstlinux_weston-linux-gnueabi/arm-openstlinux_weston-linux-gnueabi-gcc
C++ compiler path:
/opt/st/stm32mp157a-visionsom-mx/2.6-snapshot/sysroots/x86_64-openstlinux_weston_sdk-linux/usr/bin/arm-openstlinux_weston-linux-gnueabi/arm-openstlinux_weston-linux-gnueabi-g++
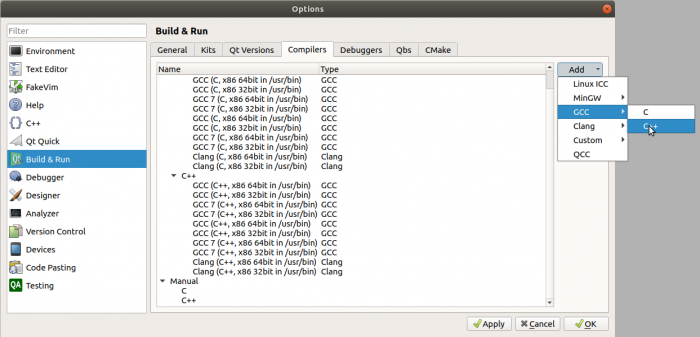
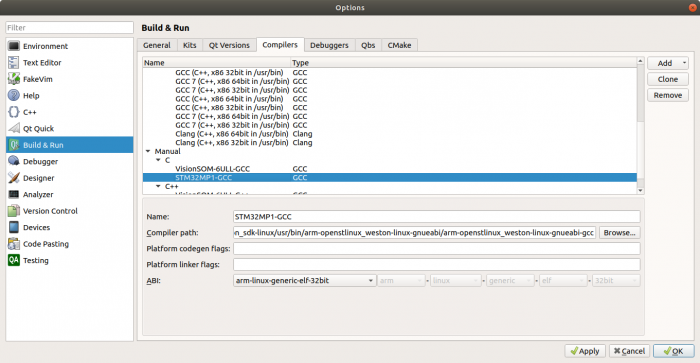
It is not required but we may also need to configure the GDB in the Debuggers tab in the same way ac the GCC/G++ compilers.
Finally, we are ready to configure a new Kit for our device. Let's add it in the Kits tab, assign a name, device and its type, sysroot directory, compilers, debugger and Qt version:
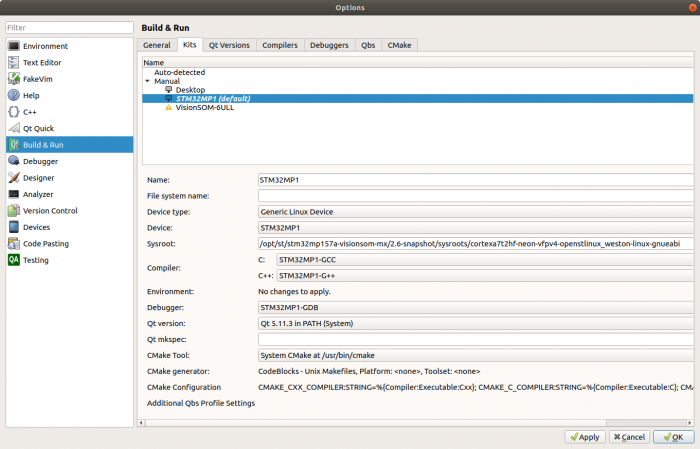
The sysroot is provided by the SDK:
/opt/st/stm32mp157a-visionsom-mx/2.6-snapshot/sysroots/cortexa7t2hf-neon-vfpv4-ostl-linux-gnueabi/
Simple Qt application
We are now ready to build the application for our device. Let's create a new Qt Widgets application project (File->New File or Project):
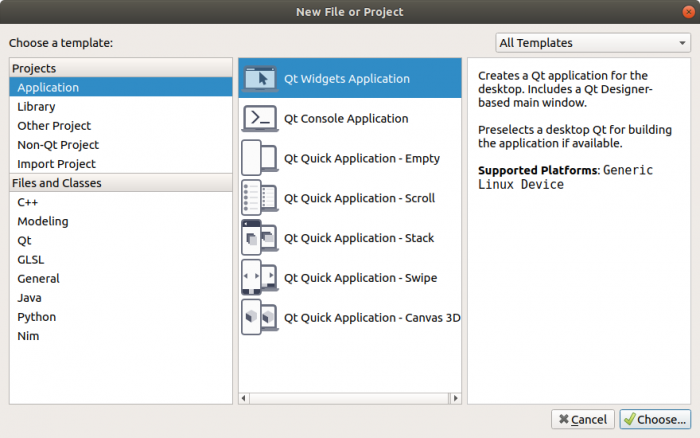
The project generator will create a new MainWindow class, main.cpp and a *.pro file (QtExample.pro in this case). The last one contains the project configuration.
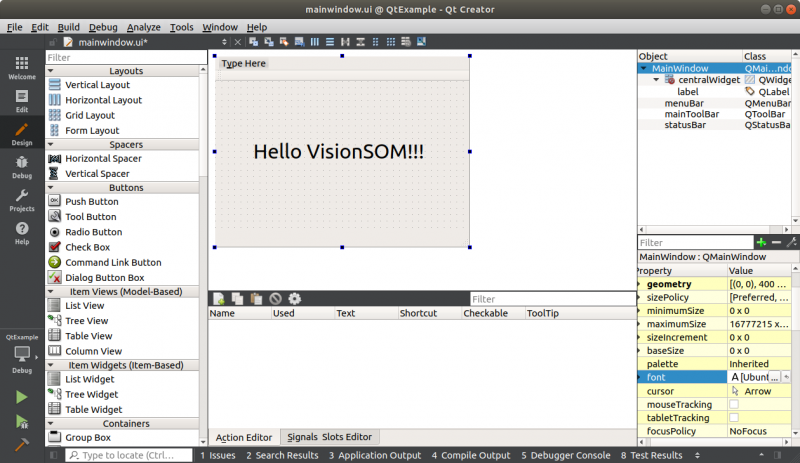
We can now open the Forms/mainwindow.ui file in the GUI designer. This tool will help us to build the graphical interface. In this example we will simply add a text label in the middle of the window:
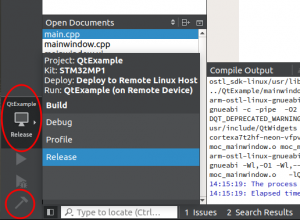
Now we are ready to compile our project by clicking the build button. In case of multiple kits we can select them also in the bottom left corner of the screen:
We can now run the application on the VisionSOM-STM32MP1 target. We can simply copy it from the build directory specified during project creation using SCP:
scp build-QtExample-STM32MP1-Release/QtExample root@192.168.7.1:
and run after logging to the target using serial or ssh connection:
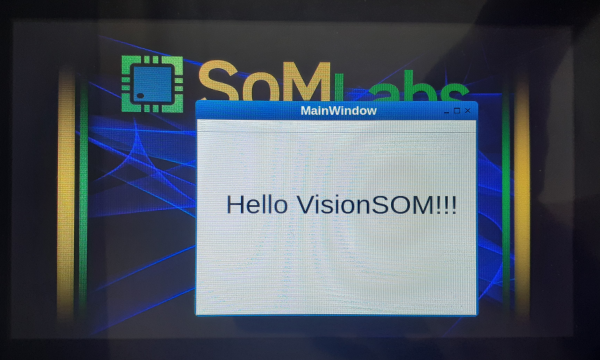
/home/root/QtExample
