SoMLabs-NN-demo: Difference between revisions
From SomLabs Wiki
No edit summary |
No edit summary |
||
| (One intermediate revision by the same user not shown) | |||
| Line 1: | Line 1: | ||
{{PageHeader|SoMLabs NN demo for SpaceSOM-8Mplus}} | {{PageHeader|SoMLabs NN demo for SpaceSOM-8Mplus}} | ||
This tutorial describes the example usage of the Neural Processing Unit in the iMX 8M Plus processor. It requires the SpaceSOM-8Mplus module with SpaceCB-8Mplus-ADV carrier board, SL-MIPI-CSI-OV5640 camera board and | |||
{{#evu:https://www.youtube.com/watch?v=xx63q5c9XgI | |||
|alignment=center | |||
}} | |||
This tutorial describes the example usage of the Neural Processing Unit in the iMX 8M Plus processor. It requires the SpaceSOM-8Mplus module with SpaceCB-8Mplus-ADV carrier board, SL-MIPI-CSI-OV5640 camera board and SL-TFT7-TP-720-1280-MIPI display. | |||
The example application uses a pre-built TensorFlow Lite model for image classification. The model is available on the TensorFlow github: | The example application uses a pre-built TensorFlow Lite model for image classification. The model is available on the TensorFlow github: | ||
Latest revision as of 16:33, 23 June 2022
SoMLabs NN demo for SpaceSOM-8Mplus
{{#evu:https://www.youtube.com/watch?v=xx63q5c9XgI |alignment=center }}
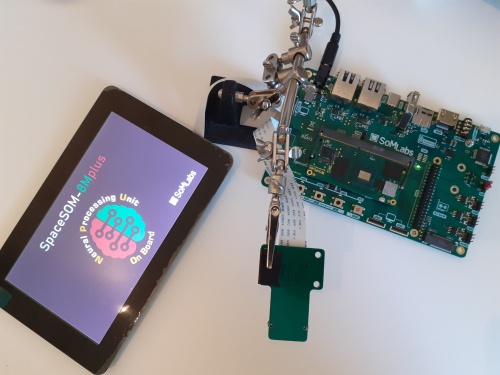
This tutorial describes the example usage of the Neural Processing Unit in the iMX 8M Plus processor. It requires the SpaceSOM-8Mplus module with SpaceCB-8Mplus-ADV carrier board, SL-MIPI-CSI-OV5640 camera board and SL-TFT7-TP-720-1280-MIPI display.
The example application uses a pre-built TensorFlow Lite model for image classification. The model is available on the TensorFlow github:
http://download.tensorflow.org/models/mobilenet_v1_2018_08_02/mobilenet_v1_1.0_224.tgz
The model is executed on hardware Neural Processing Unit using the libvx_delegate.so library provided by NXP.
Hardware setup
The camera board should be connected to the MIPI-CSI1 socket of the carrier board.
Software setup
This demo was built with the Yocto Honister default image for SpaceSOM-8Mplus and requires changes that add required packages and demo application. All the changes are collected in the provided compressed patch File:Somlabs nn demo.zip that should be applied to the meta-somlabs repository:
unzip somlabs_nn_demo.zip
cd imy-yocto-bsp/source/meta-somlabs
git apply somlabs_nn_demo.patch
Besides the demo application the patch adds the following packages to the compiled system:
packagegroup-imx-ml
python3-opencv
After applying all required changes the image should be build according to the Yocto Honister building tutorial. During the image compilation some errors may occur according to the i.MX Yocto Project User's Guide:
cc1plus: error: include location "/usr/include/CL" is unsafe for cross-compilation [-Werror=poison-system-directories]
To get around this error, add the following line in the tim-vx recipe:
EXTRA_OECMAKE += " \
-DCMAKE_SYSROOT=${PKG_CONFIG_SYSROOT_DIR} \
"
Demo application
The application reads a frame from the connected camera and after a simple processing passes it to the neural network model for classification. The processing includes:
- cropping the sides of the frame in order to obtain square image from the center field of view of the camera
- scaling the image to get size required by the model and to fit it in the display area
After the image is classified by the model the results are displayed in the application window. Each result with the classification score above the defined threshold is shown.
The full source code of the Python application is listed below:
import cv2
import numpy as np
import tflite_runtime.interpreter as tflite

DISPLAY_WIDTH = 1280
DISPLAY_HEIGHT = 720
IMAGE_CROP_FACTOR = 0.6
OUTPUT_VALID_THRESHOLD = 0.1

# Load labels for trained classification model.
def loadLabels(filename):
  with open(filename, 'r') as f:
    return [line.strip() for line in f.readlines()]

# Make the image square and crop according to the defined factor.
def cropImage(image):
  newLength = int(min(image.shape[0], image.shape[1]) * IMAGE_CROP_FACTOR)
  startX = int((image.shape[0] - newLength) / 2)
  endX = startX + newLength
  startY = int((image.shape[1] - newLength) / 2)
  endY = startY + newLength
  return image[startX:endX, startY:endY]

# Scale the square image to fit the display size.
def fitImageToDisplay(image):
  scale = min(DISPLAY_WIDTH, DISPLAY_HEIGHT) / image.shape[0]
  return cv2.resize(image, (0, 0), fx = scale, fy = scale)

# Create empty image with logo at the bottom.
def prepareLogoImage(logo, totalSize):
  logoImage = np.zeros((totalSize[0], totalSize[1], 3), np.uint8)
  logoImage.fill(255)
  logoX = int((logoImage.shape[1] - logo.shape[1]) / 2)
  logoY = logoImage.shape[0] - logo.shape[0] - 10
  logoImage[logoY:logoY + logo.shape[0], logoX: logoX + logo.shape[1]] = logo
  return logoImage

# Convert array of strings from model output.
def formatModelOutput(modelOutput, labels):
  results = np.squeeze(modelOutput)
  resultsSorted = results.argsort()[::-1]
  outputStrings = []

  for r in resultsSorted:
    if((results[r] / 255.0) > OUTPUT_VALID_THRESHOLD):
      outputStrings.append('{:03.1f}%: {}'.format(float(results[r] / 2.55), labels[r]))
    else:
      return outputStrings


# initialize /dev/video3 device.
vid = cv2.VideoCapture(3)

# Create the empty fullscreen window.
cv2.namedWindow("window", cv2.WND_PROP_FULLSCREEN)
cv2.setWindowProperty("window",cv2.WND_PROP_FULLSCREEN,cv2.WINDOW_FULLSCREEN)

# Capture a single frame to obtain resulting image size.
ret, frame = vid.read()
frame = cropImage(frame)
frame = fitImageToDisplay(frame)

# Load logo image.
logoImage = cv2.imread('somlabs_logo.jpg')

# Initialize the NN model interpreter.
interpreter = tflite.Interpreter(
  model_path = 'mobilenet_v1_1.0_224_quant.tflite',
  experimental_delegates = [tflite.load_delegate('/usr/lib/libvx_delegate.so', '')])
interpreter.allocate_tensors()

# Read the input image size from the model data.
inputDetails = interpreter.get_input_details()
outputDetails = interpreter.get_output_details()
nnHeight = inputDetails[0]['shape'][1]
nnWidth = inputDetails[0]['shape'][2]

# Read the file with model output labels.
labels = loadLabels('labels.txt')

while(True):
  # Read one frame and scale to the display size.
  ret, frame = vid.read()
  frame = cropImage(frame)
  frame = fitImageToDisplay(frame)

  # Prepare the input image for NN model
  nnFrame = cv2.resize(frame, (nnWidth, nnHeight))
  nnFrame = np.expand_dims(nnFrame, axis=0)

  # Run the model for given input.
  interpreter.set_tensor(inputDetails[0]['index'], nnFrame)
  interpreter.invoke()
  outputData = interpreter.get_tensor(outputDetails[0]['index'])

  # Create an image to display output labels and SoMLabs logo.
  logo = prepareLogoImage(logoImage, (DISPLAY_HEIGHT, DISPLAY_WIDTH - frame.shape[0]))
  outputStrings = formatModelOutput(outputData, labels)
  for i in range(0, len(outputStrings)):
    logo = cv2.putText(logo, outputStrings[i], (0, 60 * (i + 1)),
                        cv2.FONT_HERSHEY_SIMPLEX, 1.5, (45, 146, 66), 3)

  cv2.imshow("window", cv2.hconcat([logo, frame]))
  cv2.waitKey(200)
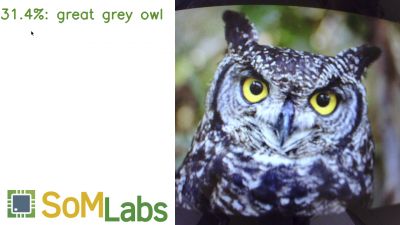
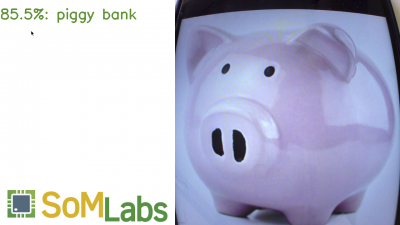
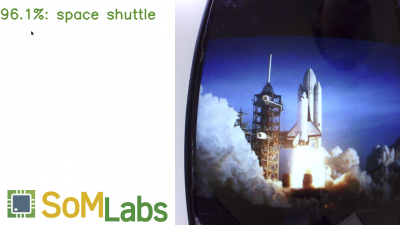
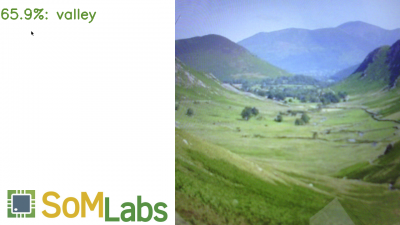
The following screenshots show some additional classification results of the pictures displayed on smartphone screen:
