Installing OpenSTLinux on VisionSOM-STM32MP1 with eMMC memory: Difference between revisions
From SomLabs Wiki
Created page with "{{PageHeader|Installing OpenSTLinux on VisionSOM-STM32MP1 with eMMC memory}} The built system file can be written to the target device memory using the STM32CubeProgrammer to..." |
No edit summary |
||
| Line 21: | Line 21: | ||
tmp-glibc/deploy/images/<MACHINE_NAME>/flashlayout_st-image-weston/trusted/ | tmp-glibc/deploy/images/<MACHINE_NAME>/flashlayout_st-image-weston/trusted/ | ||
</pre> | </pre> | ||
[[File:STM32CubeProgrammer_1.png|center|500px]] | |||
Finally select the binaries path (it should point to the directory containing listed above files and '''arm-trusted-firmware''' and '''bootloader''' directories) and press the '''Download''' button | |||
[[File:STM32CubeProgrammer_2.png|center|500px]] | |||
After programming the BOOT jumpers need to be set to 010 in order to run the installed system. | After programming the BOOT jumpers need to be set to 010 in order to run the installed system. | ||
[[File:VisionSOM-STM32MP1_emmc_otg_connect.png|center|300px]] | |||
Revision as of 16:31, 20 November 2020
Installing OpenSTLinux on VisionSOM-STM32MP1 with eMMC memory
The built system file can be written to the target device memory using the STM32CubeProgrammer tool, that is available on the STMicroelectronics website:
https://www.st.com/en/development-tools/stm32cubeprog.html
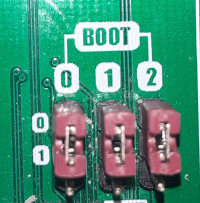
In order to program the module on VisionCB-STM32MP1-STD board, the BOOT jumpers need to be set to 000 to enable DFU boot.

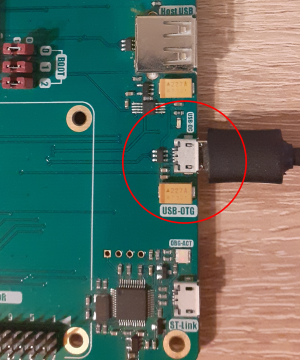
STM32CubeProgrammer should be connected by the USB cable to the USB-OTG socket.

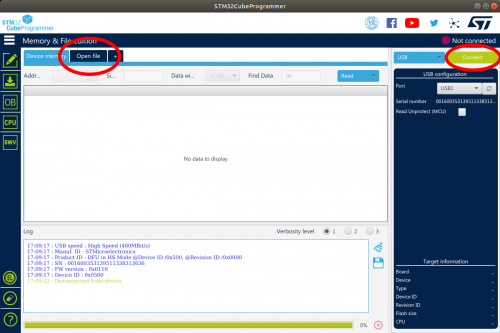
Now in the STM32CubeProgrammer window connect to the module using Connect button and select the tsv file. In the newly built system, the tsv file is in the directory:
tmp-glibc/deploy/images/<MACHINE_NAME>/flashlayout_st-image-weston/trusted/

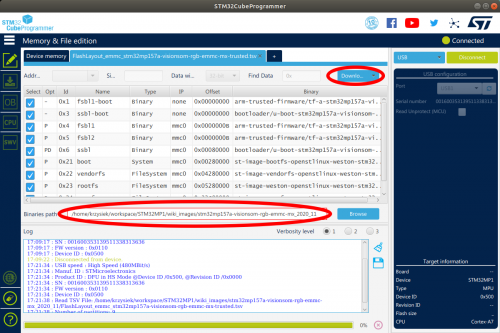
Finally select the binaries path (it should point to the directory containing listed above files and arm-trusted-firmware and bootloader directories) and press the Download button

After programming the BOOT jumpers need to be set to 010 in order to run the installed system.