StarSBC-6ULL CAN bus example
From SomLabs Wiki
StarSBC-6ULL CAN bus example
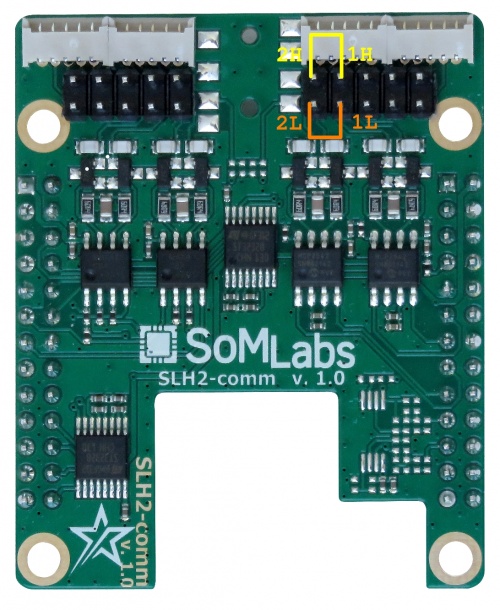
This tutorial shows how to send and receive data using CAN bus on StarSBC-6ULL with communication extension board. The default Yocto image contains all required software tools.
Loop test
The extension board has two CAN buses available so they may be connected to perform the test in a loop. All signals are available on the J101 connector. They should be connected according to the following table:
| CAN1 signal | CAN2 signal |
|---|---|
| CAN1 L (pin 8) | CAN2 L (pin 10) |
| CAN1 H (pin 7) | CAN2 H (pin 9) |

Both CAN buses are already defined in the default module device-tree and are recognized as can0 and can1 network interfaces:
root@starsbc-6ull:~# ip a
1: lo: <LOOPBACK,UP,LOWER_UP> mtu 65536 qdisc noqueue state UNKNOWN group default qlen 1000
    link/loopback 00:00:00:00:00:00 brd 00:00:00:00:00:00
    inet 127.0.0.1/8 scope host lo
       valid_lft forever preferred_lft forever
    inet6 ::1/128 scope host
       valid_lft forever preferred_lft forever
2: can0: <NOARP,ECHO> mtu 16 qdisc noop state DOWN group default qlen 10
    link/can
3: can1: <NOARP,ECHO> mtu 16 qdisc noop state DOWN group default qlen 10
    link/can
4: eth0: <NO-CARRIER,BROADCAST,MULTICAST,UP> mtu 1500 qdisc pfifo_fast state DOWN group default qlen 1000
    link/ether 5a:2d:ed:e9:cb:e4 brd ff:ff:ff:ff:ff:ff
5: sit0@NONE: <NOARP> mtu 1480 qdisc noop state DOWN group default qlen 1000
    link/sit 0.0.0.0 brd 0.0.0.0
6: wlan0: <BROADCAST,MULTICAST> mtu 1500 qdisc noop state DOWN group default qlen 1000
    link/ether 74:7a:90:ca:e4:5d brd ff:ff:ff:ff:ff:ff
The interfaces need to be configured by setting the bitrate and enabled:
ip link set can0 type can bitrate 125000
ip link set can0 up

ip link set can1 type can bitrate 125000
ip link set can1 up
The data may be generated and sent using can-utils tools: cansend, cangen, candump. The following example generates random data and sends it from can1 to can0:
root@starsbc-6ull:~# candump can0 &
root@starsbc-6ull:~# cangen can1
  can0  384   [8]  A5 45 1E 74 C6 35 1A 27
  can0  5E1   [8]  76 16 70 79 13 57 CB 02
CAN/USB converter test
This example requires the UCCB CAN/USB converter connected to the StarSBC-6ULL board and PC with Linux host. The Linux host needs also the installed can-utils package, for Ubuntu Linux:
sudo apt-get install can-utils
After connecting the CAN1 H and CAN1 L signals to the converter, a new CAN interface need to be configured on the host side. In this example the converter is recognized in host system as /dev/ttyACM1:
dev@somlabs:~$ dmesg | tail
[22206.563301] usb 1-4.1: new full-speed USB device number 58 using xhci_hcd
[22206.665197] usb 1-4.1: New USB device found, idVendor=0483, idProduct=5740, bcdDevice= 2.00
[22206.665200] usb 1-4.1: New USB device strings: Mfr=1, Product=2, SerialNumber=3
[22206.665202] usb 1-4.1: Product: CAN_USB_ConverterBasic
[22206.665203] usb 1-4.1: Manufacturer: CANDevices
[22206.665205] usb 1-4.1: SerialNumber: 00000000001A
[22206.674036] cdc_acm 1-4.1:1.0: ttyACM1: USB ACM device
The following command registers a new CAN bus interface that is attached to the /dev/ttyACM1 device:
sudo slcand -o -s4 -S 115200 /dev/ttyACM1
it sets the bitrate to 125kb and the serial baud rate to 115200.
A new interface should be visible in the system:
dev@somlabs:~$ ip a
8: slcan0: <NOARP> mtu 16 qdisc noop state DOWN group default qlen 10
    link/can
It should be set up and then may be used to transmit or receive data using can-utils tools.
On StarSBC-6ULL target:
ip link set can0 type can bitrate 125000
ip link set can0 up
cangen can0
On host:
dev@somlabs:~$ sudo ip link set slcan0 up
dev@somlabs:~$ candump slcan0
  slcan0  553   [1]  6B
  slcan0  40E   [2]  DF D3
  slcan0  2D2   [8]  39 21 3A 18 B5 26 E3 2F