Writing StarSOM-6ULL system image to eMMC memory
From SomLabs Wiki
Writing system image to eMMC memory
Prerequisites
- A complete package with NXP UUU application - uuu-visionsom-6ull.zip
- Built and extracted system image file called image.wic (from Yocto build tmp/deploy/images/starsom-cb-6ull/somlabs-image-starsom-cb-6ull.wic.bz2)
- Built bootloader binary u-boot.imx (from Yocto build tmp/deploy/images/starsom-cb-6ull/u-boot.imx)
- StarSOM-6ULL module with eMMC memory
- StarCB-6ULL carrier board
Information
The uuu-visionsom-6ull.zip archive contains the compiled NXP uuu binary for Linux, the commands script and the bootloader supporting fastboot command. The script requires the image.wic and u-boot.imx files to be in the same directory.
Preparing
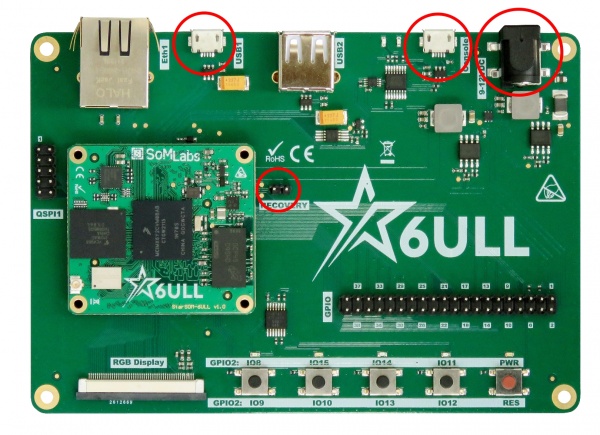
To program the memory of StarSOM-6ULL connected to the StarCB-6ULL:
- connect the two RECOVERY pins with a jumper,
- connect the USB1 port to the host PC,
- power on the board
- optionally connect the Console port to the host PC

Linux host PC
For image programing, use command:
sudo ./uuu vsom-6ull-cmds
and reset the board with the RES button
Windows host PC
For image programing, use command:
uuu.exe vsom-6ull-cmds
and reset the board with the RES button