Changing the boot splash image
From SomLabs Wiki
Changing the boot splash image
The default system configuration for VisionSOM-6ULL module contains two images displayed during the booting process. The first one is handled by the U-Boot bootloader and the second one by the Linux kernel. This tutorial describes how to update both images.

U-Boot
The U-Boot splash image is stored in the boot partition of the file system. The image file should be in the BMP format and called 'splash.bmp'. The example U-Boot splash image can be downloaded from here: Example splash image
Kernel
The second image is displayed during the Linux Kernel boot. In order to change it the kernel configuration needs to be changed - the kernel modification is described in the article: Customizing the Linux kernel.
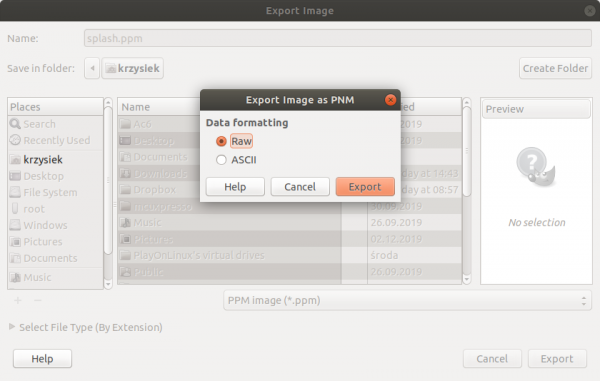
The splash image used in the default system is located in file drivers/vide/logo/logo_somlabs_clut224.ppm and has to be saved in PPM ASCII format with 224 color depth. Such file can be created by opening any image in gimp application and exporting it as PPM image (File->Export As...) with raw data formatting:

Now we need to convert the exported file to the correct color depth and ASCII format. To do this we need to install the netpbm package:
sudo apt-get install netpbm
and calling the following commands:
ppmquant 224 splash.ppm > splash_224.ppm
pnmnoraw splash_224.ppm > splash_ascii_224.ppm
Now we can copy the newly created inmage and replace the current logo:
cp splash_ascii_224.ppm drivers/video/logo/logo_somlabs_clut224.ppm
The kernel should now be rebuilt and replace the current one in the boot/zImage file.